We’ve had a few calls lately about leaking radiators, and more often than not, the problem comes from the radiator valve. If you’ve spotted a drip, don’t worry - here’s a simple step-by-step guide on how to fix a leaking radiator valve.
Whether it’s a slow drip or a more noticeable leak, addressing it quickly can prevent water damage and keep your heating system running efficiently.
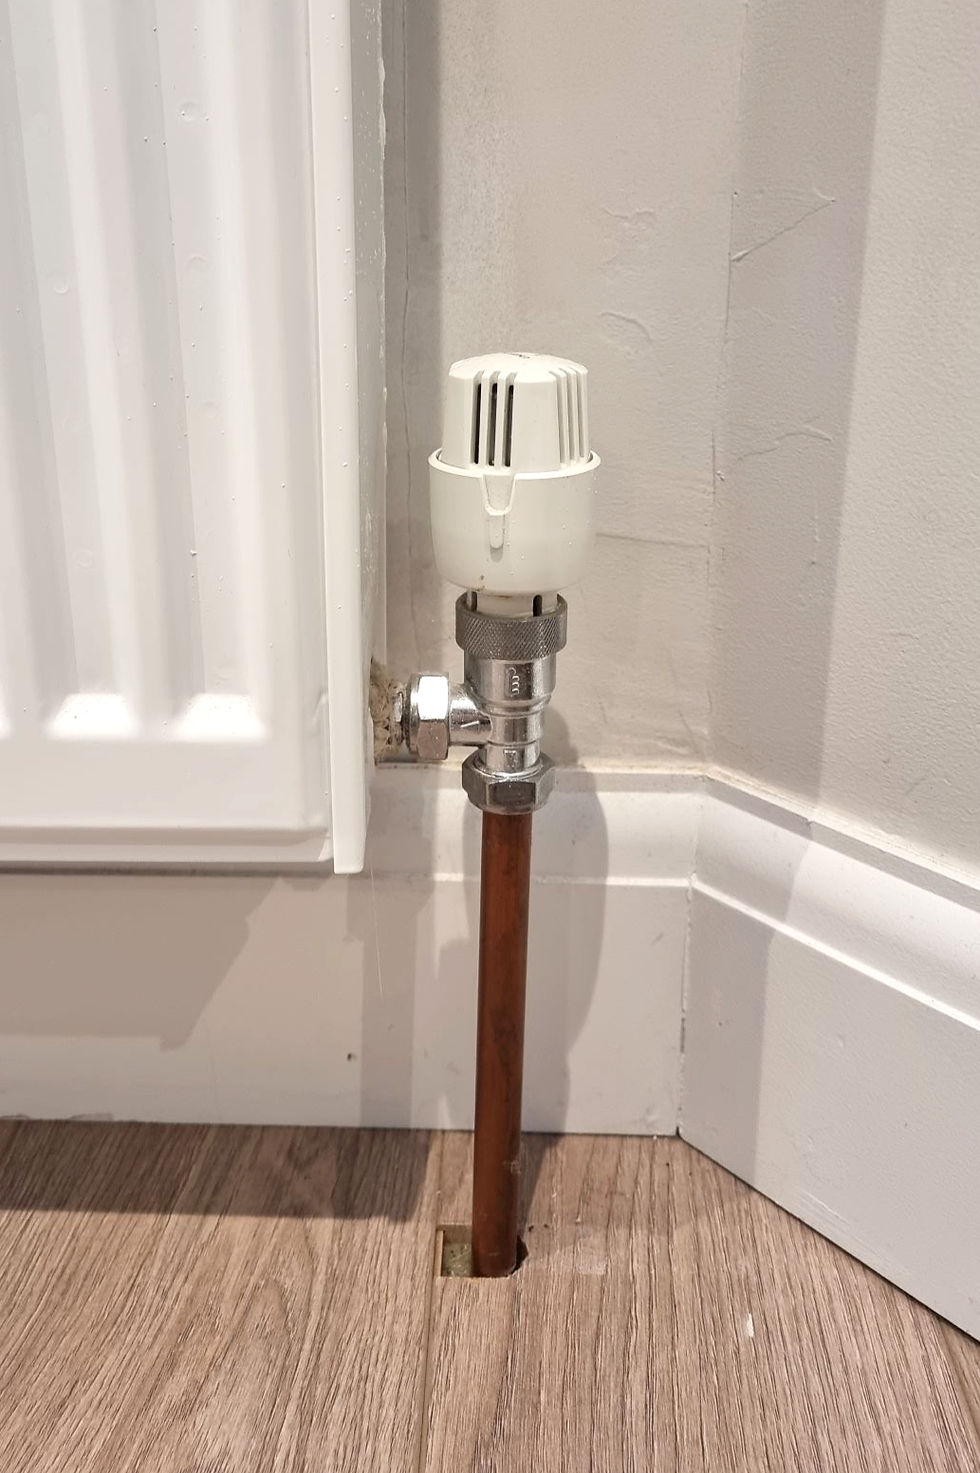
How to fix a leaking radiator valve
Step 1: Identify the Source of the Leak
Before starting repairs, find where the leak is coming from:
Water seeping from the valve spindle (the small shaft in the centre of the valve that turns when you adjust the heat) – This happens when the internal seal inside the valve wears out.
Leak from the valve coupling (where the pipe meets the valve) – Often caused by loose fittings or worn washers.
Dripping from the valve body – Indicates possible internal damage, requiring a valve replacement.
Step 2: Try Tightening the Valve
If the leak is coming from a joint, try gently tightening the valve connections with an adjustable wrench. Be careful not to overtighten, as this can damage the fittings.
Step 3: Stop a Leak from the Valve Spindle
If water is leaking from the spindle, try this fix:
Use an adjustable spanner to slightly tighten the small nut around the spindle.
If the leak persists, turn off the heating. Remove the nut and wrap some plumber’s sealing tape (PTFE tape) around the spindle threads. This helps reinforce the seal and stop water from escaping. Tighten the nut back into place.
Step 4: Reseal the Valve Connection
If the leak is coming from where the pipe connects to the valve:
Turn off the radiator’s isolation valve – This is usually found on the pipe leading into the radiator. Turn it clockwise until it stops.
Drain excess water – Place a container under the valve and use a bleed key to open the bleed valve at the top of the radiator. This will release any trapped water.
Loosen the coupling nut – This is the large nut that connects the pipe to the valve. Use an adjustable wrench to carefully loosen it.
Apply plumber's tape – Wrap plumber’s sealing tape (PTFE tape) around the exposed pipe thread to create a tighter seal.
Re-tighten the connection – Secure the coupling nut back in place and ensure it is snug but not overtightened.
Turn the radiator back on – Slowly open the isolation valve and check for leaks. If the leak has stopped, use the bleed key to release any trapped air from the radiator.
Step 5: Replace the Valve if Necessary
If the valve itself is damaged or continues to leak after resealing, it may need to be replaced. This involves:
Draining the radiator – Turn off both the isolation valve and the lockshield valve (on the opposite side of the radiator). Use a container to catch the water as you loosen the valve connections.
Removing the faulty valve – Once the radiator is drained, unscrew and remove the old valve.
Installing a new valve – Attach the new valve securely, using PTFE tape on the threads to ensure a good seal.
Refilling the system – Close all valves, then reopen them gradually to let water back into the radiator.
Bleeding the radiator – Use a radiator key to release any trapped air so the system runs efficiently.
When to Call a Plumber
If the leak persists despite these fixes, or if you’re unsure about working with your heating system, it’s best to call a professional plumber. We can quickly diagnose and fix the problem, ensuring your radiator runs efficiently without risk of further leaks.
Need help with a leaking radiator valve? We’ve helped customers in Bournemouth, Poole, and Christchurch with all kinds of leaking radiator issues.
Get in touch for expert advice or to book a repair!
Call us on 01202 985368 or book online.
Ps why not check out some of our great reviews on our Plumberly Google page.
PPs We've recently been recommended as a Three Best Rated Plumber in Poole!